 By Graham Fisher
Updated November 2026
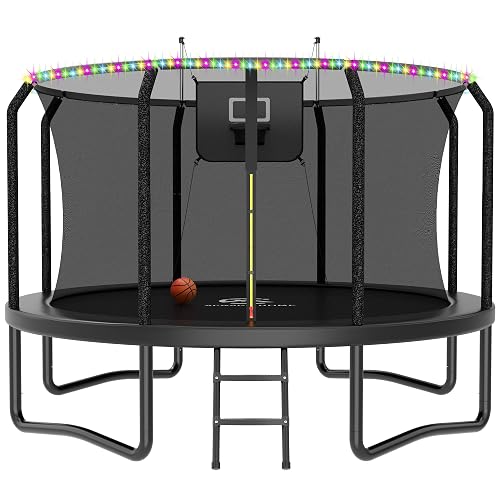
A wall trampoline fun center is a bounce-and-play setup that mounts a trampoline against a sturdy fence, garage, or exterior wall, then pairs it with add-ons such as a slackline, climbing holds, a basketball goal, or a crash pad. By the end of this guide, you will know how to measure your space, choose a compatible wall and frame, install the trampoline securely, arrange the play zones, and keep the whole setup safe for kids and adults. The approach works well in smaller yards where a freestanding trampoline would take up too much room.
What a Wall Trampoline Fun Center Includes
Most wall setups share the same core parts. The trampoline itself is a rectangular or oval bed with springs or elastic bungees attached to a steel frame that bolts to the wall. Some kits add a padded side rail, a safety net, or a ladder for climbing on and off. Others integrate extras like a swing bar, a foam pit, or a short rope course. Before you buy anything, decide which features matter most, because each one changes how much wall you need and how the frame has to be anchored.
Shopping for one? See our guide: 5 Best Outdoor Playsets for Backyard Fun in 2026.
Step 1: Measure Your Space and Check the Wall
The wall is the foundation of the entire project, so start there. Manufacturers typically specify a minimum clearance on every side of the bed, and that clearance is what keeps jumpers from striking fences, gutters, or furniture. Measure the wall height and width, then mark the footprint on the ground with stakes and string.
- Confirm that the wall is structurally sound. Brick, poured concrete, and solid wood framing are the usual choices. Vinyl or hollow-core panels generally cannot hold the load.
- Check for utility lines, sprinkler heads, and gas or electric meters within the footprint.
- Measure from the wall to the nearest obstacle on the open side. Many setups need several feet of clear space behind the bed for landings.
- Note the slope of the ground. Even a small grade changes the bed height and can make the frame sit unevenly.
If you are unsure whether a wall will carry the frame, a licensed contractor or structural engineer can inspect it. This is especially important for older masonry or any wall that shows cracks.
Step 2: Choose the Right Frame and Mounting Hardware
Frames are usually galvanized steel with powder-coated finishes. Look for a frame designed for your wall type, because a masonry anchor set is different from one meant for wood studs. Manufacturers often publish a maximum user weight and a recommended bounce zone, and those numbers should guide your choice more than any marketing claim.
Matching the Frame to the Wall
Brick and concrete need sleeve or wedge anchors sized to the bolt diameter in the kit. Wood walls need lag bolts that bite into studs, not just sheathing. Drilling into mortar joints instead of solid brick is a common error that weakens the hold. Pre-drill pilot holes to the depth specified in the instructions, and clean out the dust before inserting anchors.
Bed Size and Bounce Zone
A larger bed gives more room but demands more clearance. Plan for a bounce zone that stays at least a foot from any wall or fence on the sides, and leave the landing area free of hard edges. If the bed will hold a slackline or climbing wall, measure those attachments too, since they extend beyond the trampoline surface.
Step 3: Install the Trampoline Frame Safely
Installation is where most problems start. Work with a second adult, follow the manufacturer’s torque specs, and check every connection twice.
- Mark the mounting holes on the wall at the height specified in the manual. Use a level across the whole span so the bed sits flat.
- Drill pilot holes and install anchors. Tighten them gradually and evenly, not one side at a time.
- Attach the frame brackets to the anchors. Hand-tighten first, then torque to the recommended value.
- Connect the bed, springs or bungees, and padding. Check that the springs are evenly tensioned.
- Install the safety padding around the frame and any exposed metal edges. Replace any pad that is cracked or sagging.
- Test the structure with a slow, gentle load before allowing full use. Look for shifting, creaking, or movement at the wall.
Tools and Supplies Checklist
- Hammer drill with masonry bits (for brick or concrete)
- Stud finder and pencil for marking wood framing
- Level, at least 4 feet long
- Socket set and torque wrench
- Safety glasses and work gloves
- Dust mask for drilling into masonry
- Tape measure and string line for layout
Step 4: Plan the Play Zones and Add-Ons
A good wall trampoline fun center is more than one bed. It works best when each element has its own zone, so jumpers are not colliding with climbers or swingers. Think of the layout in three areas: the bounce surface, the approach and exit, and the side activities.
The approach should be clear and flat, and the exit should lead to a soft landing area such as rubber mulch or a foam mat. If you add a basketball goal, plan the placement carefully so the rim sits outside the bounce zone. Guides on Basketball Ring for Trampoline: How to Choose and Install One Safely cover the mounting and clearance rules in detail. For a broader look at combining bounce with other activities, 6 Best Trampolines with a Basketball Hoop for Backyard Fun (2026) compares complete setups.
Step 5: Set Up Safety Rules and Supervision
Safety rules are as important as hardware. Post them near the trampoline and enforce them consistently. The American Academy of Pediatrics recommends that children under six not use trampolines, and that only one person use the bed at a time. Fall and collision injuries are the main risk, so the layout and padding matter.
- One jumper at a time, unless the manufacturer specifically rates the bed for more.
- No somersaults or flips unless trained and supervised.
- No jumping onto the bed from the wall side or from elevated structures.
- Keep the padding in place and inspect it before each session.
- Check bolts, springs, and anchors every month and after storms.
If you have questions about medical risk or your child’s readiness, consult a pediatrician or a qualified professional before setup.
Common Mistakes
- Mounting to unsuitable walls. Vinyl siding over hollow framing is not a safe anchor point.
- Skipping the level check. An uneven bed shifts the bounce and stresses the frame.
- Too little clearance. Jumpers who land near fences or furniture get hurt.
- Ignoring weather. Rain, snow, and heavy wind loosen anchors and degrade padding over time.
- Overloading the bed. Adding multiple jumpers or heavy accessories beyond the rated limit weakens the structure.
Tips for a Better Setup
- Sketch the full layout on paper before drilling anything.
- Choose a landing surface that absorbs impact, such as rubber mulch or thick foam.
- Plan for shade, since sun can degrade pads and fabric faster than you expect.
- Keep a small kit of spare bolts, springs, and pad fasteners for quick repairs.
- Revisit the rules as children grow, since weight limits and age guidance may change.
Recommended gear
- Hammer drill with masonry bits: Essential for mounting into brick or concrete walls without cracking the surface. View on Amazon
- Torque wrench: Lets you tighten frame bolts to the manufacturer’s specification, which matters for long-term stability. View on Amazon
- Rubber mulch landing surface: Provides impact absorption under and around the bed, a common recommendation for play areas. View on Amazon
- Four-foot torpedo level: A long level keeps the frame flat across the full wall span. View on Amazon
FAQ
Can I mount a wall trampoline to a vinyl fence?
Generally no. Vinyl fences lack the structural strength to hold the load and anchor reliably. Use a solid wall, a reinforced post system, or a concrete base instead, and confirm with the manufacturer.
How much clearance does a wall trampoline need?
Clearance varies by model, but most setups need at least a foot of open space on the sides and more behind the bed for safe landings. Check the manual for the exact figure.
Is a wall trampoline safer than a freestanding one?
Not automatically. A wall mount can reduce the footprint and eliminate some tipping risk, but it still creates fall and collision hazards. Safety depends on installation quality, padding, supervision, and rules.
How often should I inspect the frame?
Check bolts, springs, and padding monthly, and again after heavy wind or storms. Replace worn parts promptly rather than waiting for a failure.
What age is appropriate for a wall trampoline?
The American Academy of Pediatrics advises against trampoline use for children under six. Older children should use the equipment under supervision and follow the manufacturer’s weight and age limits.
Can I add a basketball hoop to a wall-mounted bed?
Some kits allow it, but the hoop must be rated for the setup and placed outside the bounce zone. Confirm compatibility with the manufacturer before mounting.
Do I need a permit to install a wall trampoline?
Requirements vary by city and county, and some jurisdictions regulate structures attached to homes or property lines. Check local building and zoning rules before starting the project.
What landing surface is best under a wall trampoline?
Thick rubber mulch, engineered wood fiber, or dense foam mats are commonly recommended because they absorb impact better than grass or bare soil.
Conclusion
A wall trampoline fun center can turn a narrow side yard or fence line into a lively play space, but only if the wall, frame, and layout are planned with care. Measure carefully, install with the right anchors, leave generous clearance, and enforce simple safety rules. Inspect the setup regularly, and when in doubt about structural or medical questions, bring in a qualified professional.
Related reading
- Retaining Wall Ideas for Sloped Backyard: 7 Designs and How to Choose
- Best Outdoor Speakers for Backyard Fun: 6 Speakers Compared
- 6 Best Fire Pit Propane Camping Picks for Portable Outdoor Fun (2026)
Ready to choose one?
About Graham Fisher
Graham Fisher is part of our editorial team and reviews and edits our backyard living & play guides, checking product details against manufacturer specifications and owner feedback.