 By Graham Fisher
Updated November 2026
A swing set do it yourself project lets you build a backyard play structure that fits your yard, your children’s ages and your skill level. With a clear plan, accurate measurements and proper anchoring, you can finish a sturdy frame that holds up to years of climbing, swinging and sliding. This guide walks through site selection, planning, materials, assembly and safety checks so you know what to expect before you pick up a drill.
Why Build a Swing Set Yourself?
Many families choose a swing set do it yourself approach because it allows full control over height, layout and features. You can add a short slide for toddlers, a taller bar for older kids, or a swing beam sized to your lumber. Owners often report that building from a kit or plan also teaches them exactly how each part is connected, which makes later repairs easier. Building takes time and tools, though, and it demands careful attention to safety details that a pre-engineered kit handles for you. If you are comparing options, our overview of Wooden Porch Swing Set: A Step-by-Step Guide to Choosing and Setting One Up covers how wood structures differ from ready-made frames.
Shopping for one? See our guide: Backyard Discovery Skyfort II Cedar Swing Set Playset Review (2026).
Step 1: Choose and Prepare the Site
Location matters as much as design. Playground safety guidance from the U.S. Consumer Product Safety Commission (CPSC) recommends a use zone that extends at least 6 feet in all directions from the play structure, and 8 feet behind a swing’s rear arc. Choose level ground, away from fences, trees, sheds and overhead wires.
Site checklist
- Clear space of at least 12 feet by 16 feet for a basic frame, plus use zone
- Level the ground to within about 1 inch across the footprint
- Check for underground utilities before digging (call 811 in the US)
- Confirm drainage so water does not pool under the frame
- Choose a surface with impact absorption, such as wood chips, rubber mulch or sand, to a depth of at least 9 inches
Step 2: Plan the Layout and Measurements
Sketch your design on paper before you buy any lumber. Mark the footprint, the height of each platform and the swing beam position. Most residential swing sets stay under 8 feet in height for safety, and many families choose 6 to 7 feet for the top bar. Keep swing seats at least 12 inches above the surface when they are at rest, and never place a swing where a child could be struck from behind by a moving seat.
Plan your anchor points at the same time. Each corner post should be set in concrete or fitted with a ground anchor rated for the load. Swing sets must withstand active use, so spacing and bracing matter.
Step 3: Gather Materials and Tools
Use pressure-treated lumber rated for ground contact, galvanized hardware and exterior-grade fasteners. Avoid untreated wood and standard interior screws, which corrode and fail.
| Category | Typical items | Notes |
|---|---|---|
| Posts | 4×4 or 6×6 pressure-treated posts | Length depends on design and burial depth |
| Beams | 2×6 or 2×8 treated lumber | Used for top rails and swing beam |
| Hardware | Carriage bolts, lag screws, galvanized brackets | Stainless or hot-dip galvanized preferred |
| Anchoring | Concrete mix, gravel, post anchors | Set posts at least 24 inches deep |
| Tools | Drill, impact driver, level, post hole digger, saw, socket set, tape measure | A socket set speeds bolt tightening |
Step 4: Dig Holes and Set the Posts
- Mark post locations using your plan and check diagonals so the frame is square.
- Dig holes about 24 to 30 inches deep and roughly 10 inches wide.
- Add 4 to 6 inches of gravel at the base for drainage.
- Set each post plumb with a level, bracing it temporarily.
- Fill with concrete, sloping the top slightly away from the post, and allow it to cure for at least 48 hours before loading.
Step 5: Assemble the Frame
Attach top rails and cross braces before adding the swing beam. Pre-drill every hole to prevent splitting, especially near wood ends. Tighten bolts in stages, checking that the frame stays square as you go. Install any diagonal bracing that your plan calls for, since it resists racking when kids swing hard.
Attaching the swing beam
Use a beam sized for the load and rated for the number of seats you plan to install. Secure it with through-bolts rather than lag screws alone, and double-check the bolt tightness after the first week of use.
Step 6: Install Swings, Slides and Accessories
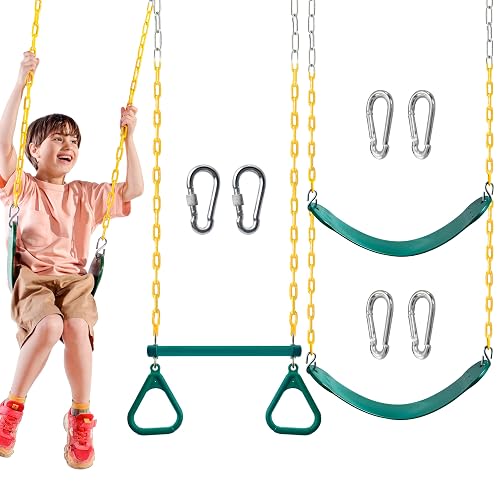
Hang swing seats with heavy-duty chain or rope rated for playground use. Attach slide sections according to the manufacturer’s instructions if you purchased components, and make sure every connection is locked. Our guide to Swing Set and Chain: How to Choose, Hang and Maintain the Right Chain (2026) explains which chain sizes and hangers suit different seat types.
Step 7: Final Safety Inspection
Before anyone uses the set, walk through a full inspection. Shake every joint, tighten any loose bolt, and check that no wood has cracked or splintered. Confirm that the surface depth is adequate under all play areas and that the use zone is clear.
- All bolts tight and washers in place
- No exposed bolt ends that could catch clothing
- Swings hang at a safe height with no pinch points
- Protective surfacing extends beyond the use zone
- Wood sealed or stained to resist weather
Inspect the structure monthly during the first year and at least twice a year afterward. Replace any cracked wood, rusted hardware or frayed rope or chain immediately.
Common Mistakes to Avoid
- Skipping post depth. Shallow posts rock and loosen the entire frame.
- Using untreated lumber. Wood in contact with soil rots within a few seasons.
- Ignoring the use zone. Placing the set too close to fences or walls causes collisions.
- Mixing hardware types. Combining steel and aluminum fasteners can accelerate corrosion.
- Loading the frame before concrete cures. Give it at least two full days.
- Overlooking maintenance. Loose bolts and worn chains are the most common cause of injury on home sets.
Tips for a Better Result
- Build a scale model with cardboard or string to test clearances before cutting wood.
- Round over sharp edges with a router or sandpaper.
- Stain or seal wood every one to two years to extend its life.
- Store spare hardware and a copy of your plan with the project file.
- Consider a lower top rail if you have toddlers, and add features as children grow.
Recommended gear
A few tools make a swing set do it yourself project much easier and safer. A reliable cordless drill with a clutch helps you avoid stripping screws in treated lumber. A post hole digger or auger speeds up the most labor-intensive step. A four-foot level keeps posts and beams true across the frame. Finally, a quality socket set lets you torque bolts evenly to the specification in your plan.
- Cordless drill driver for pre-drilling and driving lag screws: View on Amazon
- Manual post hole digger for setting posts: View on Amazon
- Four-foot torpedo level for checking plumb: View on Amazon
- Socket wrench set for tightening carriage bolts: View on Amazon
FAQ
How deep should swing set posts be buried?
Most builders set posts at least 24 inches deep, and deeper in cold climates where frost heave is a concern. Check your local building code for requirements.
Do I need a permit to build a swing set?
Many towns do not require a permit for a small backyard play structure, but rules vary. Contact your local building department before you start.
What is the best wood for a DIY swing set?
Pressure-treated pine rated for ground contact is the most common choice. Cedar and redwood resist decay naturally but cost more and may be softer.
How much space does a backyard swing set need?
Plan for the footprint plus a use zone of at least 6 feet on all sides, and 8 feet behind swings. A basic frame usually needs a clear area well over 12 by 16 feet.
What surface is safest under a swing set?
Loose-fill surfaces such as wood chips, shredded rubber or sand, at a depth of about 9 inches, provide good impact protection when maintained.
How often should I inspect a homemade swing set?
Check monthly during the first year, then at least twice a year. Tighten bolts, replace damaged parts and look for cracks or rust.
Can a beginner build a swing set do it yourself?
Yes, if you follow a tested plan and work carefully. For complex structures or uneven terrain, consider consulting a licensed contractor or a structural professional.
Conclusion
A swing set do it yourself project rewards careful planning, sound materials and disciplined safety checks. Start with the site and a scale layout, anchor every post properly and inspect the structure regularly once children are using it. With those steps, you can build a backyard play space that lasts for years.
Related reading
- Backyard Discovery Grayson Peak Cedar Swing Set/Playset: Setup and Buyer's Guide
- 7 Best Accessories for Swing Set Picks for Backyard Play (2026)
- 5 Best Swing Sets for Playground Options for Backyards (2026)
- 5 Best Parts of a Swing Sets (2026): Our Picks
Ready to choose one?
About Graham Fisher
Graham Fisher is part of our editorial team and reviews and edits our backyard living & play guides, checking product details against manufacturer specifications and owner feedback.