 By Colin Foster
Updated November 2026
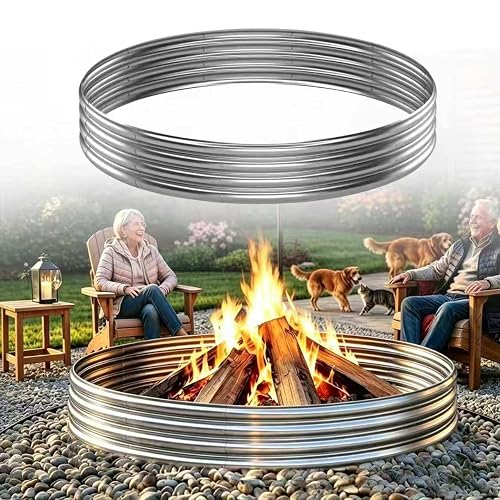
A do-it-yourself fire pit kit lets you build a permanent backyard fire pit in a weekend without hiring a mason. Most kits bundle the fire ring or liner, the base layer, and the cap or capping stones, so you mainly need a level site, a few basic tools and a careful plan. This guide covers how to choose a kit, prepare the site, assemble the pit and keep it safe once it is lit.
Choosing the Right Kit
Start with the fuel you plan to burn. Wood-burning kits usually use a thicker, heat-resistant liner, while gas-ready kits need space for a burner and a gas line or tank connection. Check the diameter as well. A 36-inch ring suits a small patio and seats four to six people comfortably, while larger rings take more space and need more clearance from the house and fencing.
Shopping for one? See our guide: 6 Best Kits for Fire Pit Options for Backyard Gas Burners (2026).
Look closely at what the manufacturer includes. Some kits ship with the full ring, cap stones and base panels. Others only include the ring, so you would need to source paver base, sand and cap material separately. If you are comparing options, the Fire Pit Kits DIY: 7 Best Picks for Backyard Builders in 2026 roundup shows how different kit styles stack up for backyard builders.
Preparing the Site
Pick a spot that is level, well drained and at least 10 feet from the house, deck rails, overhanging branches and any fence. Many local codes and manufacturers specify larger distances, so confirm the requirements with your city or county before you dig. Call 811 before digging to have underground utilities marked.
Once the spot is chosen, dig out the area to a depth that allows about 4 to 6 inches of compacted gravel base plus the thickness of the kit’s base layer. Compact the gravel in layers, checking it with a level as you go. A wobbly base is the most common reason a finished pit cracks or shifts.
Assembling the Fire Pit Step by Step
- Lay out the outline with a stake and string, marking a circle that matches the kit’s diameter.
- Dig to depth and spread a 4-inch layer of compacted crushed gravel, then add a thin layer of sand if the kit calls for it.
- Set the first course of the ring or liner on the base, checking level on every block or panel.
- Stack the remaining courses, staggering joints the way the instructions show and using the adhesive or clips the kit specifies.
- Install the cap or top course and fill any gaps. For gas kits, route the line and test every connection with soapy water before lighting.
- Backfill the outside of the ring with gravel or pavers so the structure is supported on all sides.
Tools You Will Need
- Shovel and tamper or plate compactor
- Four-foot level and tape measure
- Stakes, string line and marking paint
- Rubber mallet and masonry adhesive if the kit uses it
- Safety glasses and work gloves
Safety Checks Before the First Fire
Keep a fire extinguisher or a garden hose within reach. Clear dry leaves, mulch and furniture from the area, and store fuel and lighter fluid away from the pit. Use only the fuel the manufacturer approves. For gas models, have a licensed professional inspect any permanent gas line, since improper connections are a serious hazard. If you are unsure about gas work or local permits, consult a licensed contractor or your local building department.
Recommended Gear
- Plate compactor: Compacting the gravel base in layers is what keeps the finished pit level for years, and a compactor does it far faster than a hand tamper. View on Amazon
- Four-foot level: A long level catches small height differences between courses that a short one misses. View on Amazon
- Masonry adhesive: Kits that call for bonding the courses need an adhesive rated for outdoor use and freeze-thaw cycles. View on Amazon
Common Mistakes
- Skipping or under-building the gravel base, which leads to settling and cracks.
- Placing the pit too close to structures, trees or fences.
- Stacking courses without checking level after each row.
- Ignoring wind direction, which can push smoke toward seating and neighbors.
- Burning treated wood, painted materials or trash, which release harmful fumes.
FAQ
Can I build a fire pit kit on a wood deck?
Most manufacturers do not recommend placing a wood-burning pit directly on a combustible deck. Use a noncombustible pad or a designated patio surface, and check the kit’s instructions for minimum clearances.
How long does assembly take?
Many people finish a standard ring kit in one to two days, depending on site digging and how much gravel compaction is needed. Gas-ready kits take longer because of the line connection and testing.
Do I need a permit?
It depends on your location and whether the pit includes a gas line. Check with your local building or fire department before you start, and consult a licensed professional for any gas work.
Conclusion
A do-it-yourself fire pit kit is a practical way to add a lasting gathering spot to your yard. Choose a kit that matches your fuel type and size, prepare a level, well-compacted base, and follow the assembly steps in order. Take the safety checks seriously and your pit will be enjoyable for many seasons.
Related reading
- Top 7 Movable Gas Fire Pit Options for Patios and Backyards (2026)
- Top 7 Gas Backyard Fire Pit Picks for Patios and Decks in 2026
- Top 7 Fire Pits with Propane Tank Picks for Backyards (2026)
- Top 7 Fire Pits with Gas Models for Patios and Backyards in 2026
- Top 6 Propane Fire Pit Camp Picks for Camping and Backyard Use
Ready to choose one?
About Colin Foster
Colin Foster is part of our editorial team and reviews and edits our backyard living & play guides, checking product details against manufacturer specifications and owner feedback.